Intro
The first stage of model iteration is research validation. Before a new model, provider, prompt, adapter, or inference configuration reaches infra and QA, the research team should be able to explain why the change is worth testing further.
This post focuses on LLM model investigation inside production-driven teams. The same validation mindset can apply to other ML systems, but the specific evaluation design, failure modes, and deployment constraints may be very different.
If you have not read the series intro yet, it provides the larger workflow. This post zooms in on the first line of defense: validating the model research before it becomes an engineering project.
I will cover four topics:
- The main forms of LLM model investigation
- A practical strategy for early-stage LLM teams
- How to test accuracy and stability
- A small validator workflow that makes the process repeatable
Model Investigation
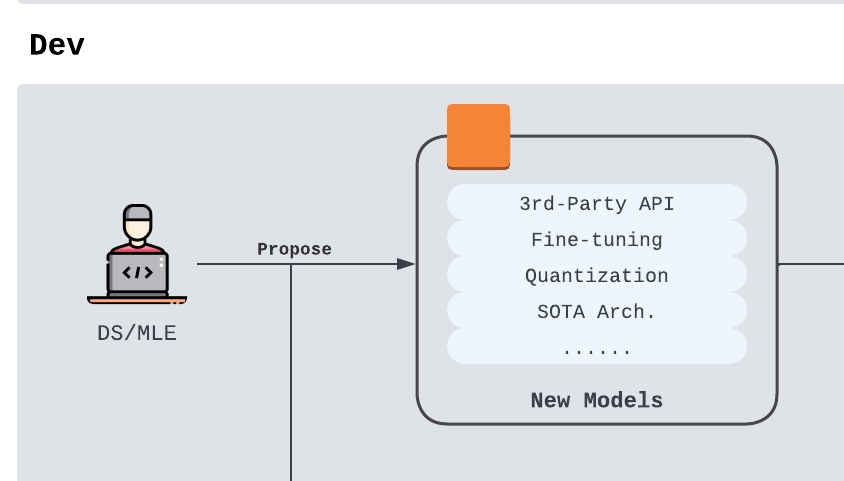
In the model iteration workflow, a research proposal usually falls into one of three buckets:
- Provider change: switching to a different third-party API or hosted model provider
- Architecture change: changing the model architecture, serving architecture, or inference engine
- Parameter change: changing prompts, decoding parameters, fine-tuned weights, adapters, or other task-specific configuration
Each option has a different cost profile and validation burden:
- Third-party API: fast to test and easy to integrate, but can create long-term cost and vendor-dependency risk. This is often a good fit for early product teams.
- Architecture-based change: can unlock large system-level gains, but is expensive, slow, and infra-heavy. This is usually a better fit for mature ML teams.
- Parameter-based change: often gives the best task-specific lift, but can overfit or hide stability issues. This is the most common path for LLM product teams.
These paths are connected. A team may test a new provider and new prompt strategy at the same time, or combine fine-tuning with a new inference engine. Still, every proposal should eventually translate into business or product value. A model change that only looks good in an isolated notebook is not ready for the next stage.
This is why research validation needs to be cautious. A flawed assumption at this stage can waste infra time, QA time, and leadership attention later. The goal is not to prove that an idea is exciting; the goal is to decide whether it is solid enough to deserve more expensive validation.
A Practical Investigation Strategy
Every LLM team has its own process. For a startup or a newly formed LLM team, I would start with a five-step loop.
Step 1: Pick a Baseline Model
New teams often do not know which model is best for a task. Start with a widely adopted model that is strong enough to act as a reliable reference point. This could be a direct provider such as OpenAI, Anthropic, or Google, or a managed platform such as Bedrock, Together, or Vertex AI.
Avoid premature optimization early on. Before traffic and product requirements are clear, the hidden engineering cost of small open-source models or custom serving stacks can outweigh the visible API cost of a stronger hosted model.
The baseline should remain stable enough that every future model proposal can be compared against it. As the validation dataset changes, the baseline statistics should be regenerated automatically.
Step 2: Pick an Inference Configuration
The configuration should cover the full inference path, not just the model name. At minimum, track:
- Provider and model version
- Prompt version
- Decoding parameters such as
temperature,top_p, andmax_tokens - Streaming or non-streaming behavior
- Function calling or structured-output mode
- Preprocessing and post-processing logic
These decisions can change accuracy, latency, stability, and cost. Treat them as part of the model proposal rather than incidental settings.
Step 3: Estimate the Projected Impact
Before running a full experiment, define what kind of improvement the proposal is supposed to create. I use the CLASS objective:
- Cost: Does the change reduce cost per request or total operating cost?
- Latency: Does it reduce model latency or end-to-end service duration?
- Accuracy: Does it improve the task metric that matters to the product?
- Security: Does it preserve guardrails against harmful content, prompt attacks, or data leakage?
- Stability: Does it produce consistent behavior across similar inputs and repeated runs?
Thinking through all five dimensions prevents a narrow optimization from damaging the product. A model that improves accuracy but makes latency unpredictable may still be a bad trade.
Step 4: Execute and Analyze
This is where the research work becomes concrete: collect the dataset, run the baseline, run the candidate, compare metrics, inspect failures, and decide whether the idea survives.
The important part is repeatability. The team should be able to rerun the same validation when the dataset changes, the prompt changes, or a new model version appears. A tool like llm-validator is useful because it turns model validation into a pipeline instead of a one-off script.
Step 5: Compile and Ship the Proposal
If the candidate passes research validation, package the result for the infra and QA stages. The handoff should include:
- The baseline and candidate configuration
- Dataset description and sampling logic
- Accuracy and stability results
- Known failure cases
- Cost and latency assumptions, if available
- Rollback or fallback recommendation
At this point, the research team is not saying the change is production-ready. It is saying the change is worth deeper infra, QA, and product validation.
Accuracy and Stability
The CLASS objective includes cost, latency, accuracy, security, and stability. At the research-validation stage, however, the team may not yet have the full infra environment required to measure cost, latency, or security rigorously. In practice, researchers usually focus first on accuracy and stability.
A/B Testing Is the Backbone
Accuracy and stability tests should compare the candidate against a baseline. The basic A/B testing mindset still applies: keep the dataset, prompt contract, task definition, and evaluation logic consistent, then isolate the effect of the model change.
If you want a refresher, I have a separate A/B testing post that covers the general idea.
Components of an Inference Test
A useful inference test should define five components:
- Task: What is the input format, output format, and expected behavior?
- Dataset: Where does the input come from, who labeled it, how large is it, and what quality issues might exist?
- Model or engine: Which provider, model version, client, and inference settings are being tested?
- Prompt: Which prompt version is used, and does the candidate use the same prompt as the baseline?
- Metrics: Which scores matter, and are any old metrics no longer aligned with the product goal?
For accuracy, the dataset should cover the real input domain well enough that the result is meaningful. For example, in a chunk-validation task, the dataset should represent the knowledge base and evaluate relevance, precision, recall, or another metric tied to retrieval quality. The candidate should beat the baseline by a margin that is statistically and practically meaningful.
For stability, construct groups of similar queries where the expected outputs should be identical or nearly identical. Then measure the output similarity, score variance, invalid-output rate, and failure patterns. If similar inputs produce surprising deviations, the team should inspect those cases before moving the model forward.
Logging
The validator should return more than a final score. It should save distributions, per-example outputs, aggregate metrics, warnings, and errors. Hidden warning patterns often reveal production risks earlier than the headline accuracy number.
A Small Validator Demo
The rest of this post shows the shape of a repeatable validation pipeline using llm-validator. The current repo includes a simple classification example, but the same structure can be adapted to a GPT-to-Claude migration, code-generation task, or any other LLM evaluation.
Step 1: Define the Validation Components
Clone the repo and identify the major components:
git clone git@github.com:Criss-Wang/llm-validator.git
cd llm-validator
For a basic classification validation, the components are:
- Task: classify an input into the expected label
- Dataset:
datasets/classification.csv - Model: an OpenAI client or another client under
llm_validation/components/clients - Prompt:
prompts/classification.yaml - Metrics: accuracy, plus optional latency and cost metrics
For a serious A/B test, use a dataset large enough to support multiple batches and statistically meaningful comparisons.
Step 2: Define the Metric
For classification, the accuracy metric can be simple: compare the normalized model output against the expected label, then aggregate the results.
class ClassificationAccuracy(AccuracyWithGroundTruth):
    async def grade(self, input, output: str, label: str):
        predicted = output.lower().strip()
        expected = str(label).lower().strip()
        return {"correctness": predicted == expected}

    def aggregate(self):
        correctness = self.scores["correctness"]
        passed = sum(correctness)
        total = len(correctness)
        self.stats.update(
            {
                "total_correct": passed,
                "total_wrong": total - passed,
            }
        )
For more complex tasks, replace this with an LLM-as-a-judge metric, semantic similarity metric, rubric-based grader, or task-specific evaluator. Custom metrics live under the metrics folder.
Step 3: Define the Configuration
The configuration ties the task, client, prompt, dataset, metrics, and controller together. A simplified version looks like this:
{
  "project": "integration-test",
  "task_config": {
    "name": "classification"
  },
  "client_config": {
    "client_name": "openai",
    "client_type": "third_party_llm",
    "model_name": "gpt-4o-mini",
    "model_type": "gpt-4",
    "model_options": {
      "temperature": 0,
      "max_tokens": 1024,
      "top_p": 1
    }
  },
  "prompt_config": {
    "name": "classification",
    "path": "prompts/classification.yaml",
    "version": 1
  },
  "evaluator_config": {
    "metrics": [
      {
        "type": "accuracy",
        "aspect": "classification-all"
      },
      {
        "type": "latency"
      },
      {
        "type": "cost"
      }
    ]
  },
  "dataset_config": {
    "data_path": "datasets/classification.csv",
    "label_col": "true_label",
    "sanity_test": true
  },
  "controller_config": {
    "save_path": "results/tests",
    "parallelism": 12,
    "use_streaming": false,
    "save_inference": true
  }
}
The live sample config is available at configs/openai.json. For additional fields, refer to configs.py.
Step 4: Run the Experiment
Install the package and development dependencies:
pip install -r requirements.dev.txt
pip install -e .
If you use Weights & Biases for experiment logging, log in before running the experiment. Then run the validator:
llm-validator run --config-path=configs/openai.jsonA successful run should produce console metrics, saved results, and experiment logs. A compact console result might look like this:
-------- Accuracy ----------
total_correct: 42
total_wrong: 8
-------- Latency ----------
p50_ms: 820
p95_ms: 1460
-------- Cost ----------
estimated_cost_usd: 0.31
Step 5: Repeat for the Candidate
Duplicate the baseline config, change the candidate model or provider, and run the same dataset again. Then aggregate the results across multiple batches.
The final research recommendation should answer:
- Did the candidate beat the baseline on the target metric?
- Did it introduce new failure modes?
- Is the improvement large enough to justify infra validation?
- What should infra and QA pay attention to next?
Take-Home Challenge
The demo above focuses on accuracy. Stability is harder because it requires defining groups of similar inputs, then measuring whether the model behaves consistently across them. A useful exercise is to implement a stability metric that groups related queries, measures output similarity, and reports variance or drift.
If you have questions, open an issue in the llm-validator repo, and I will clarify the challenge there.
Final Words
Improving the model iteration process does not stop with research validation. Once a proposal survives this stage, the next question is whether the model can work inside the real serving system. That brings us to infra validation, where latency, cost, scaling, and service compatibility become the center of the work.
Before that blog comes out, Stay Hungry, Stay Foolish.